Path through this site: Home Guide
Pikobuy walkthrough, invitation code to delivered parcel
Pikobuy publishes six steps. Here they are step by step, with the screens behind them, the official video, and the details each step hides.
The official tutorial, unedited
Pikobuy's guide page carries a 1 minute 37 second video that runs through every step below. We show it as published. A few frames show demo account values such as a large wallet balance; those are the operator's example numbers, not prices you will pay.
Step zero: an account with a referral code
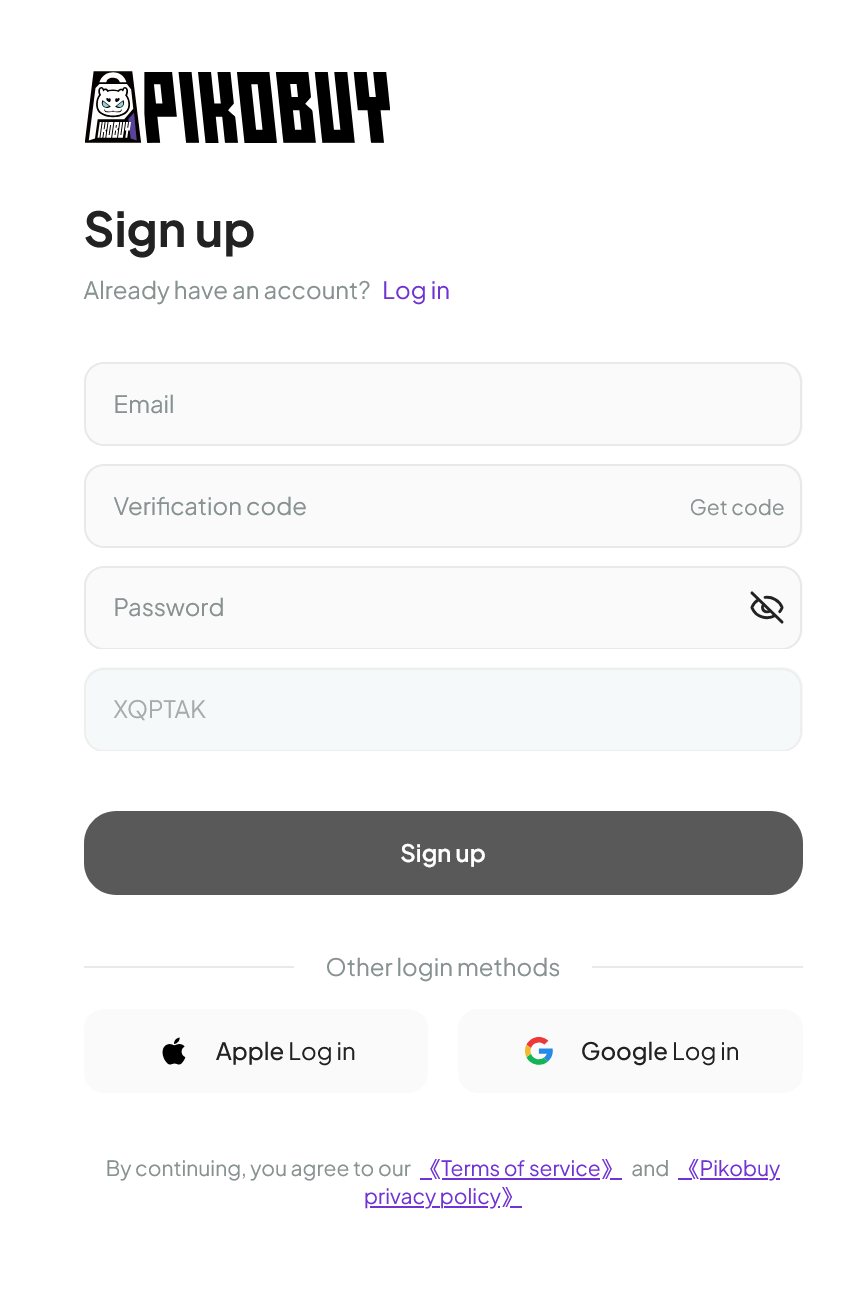
Pikobuy signs you up with an email address and a verification code sent to it, plus a password. Apple and Google sign-in are offered as alternatives. The fourth field holds an invitation code; a referral link fills it automatically. Ours fills in XQPTAK, and we earn a referral reward when you use it. The terms you agree to on that screen are Pikobuy's terms and its privacy policy, linked in small print below the button.
Before you order anything, set a shipping address and pick the display currency from the language menu in the header. Pikobuy notes that converted prices are for reference and that the checkout amount is the one you pay.
Step one: settle the item on its home marketplace
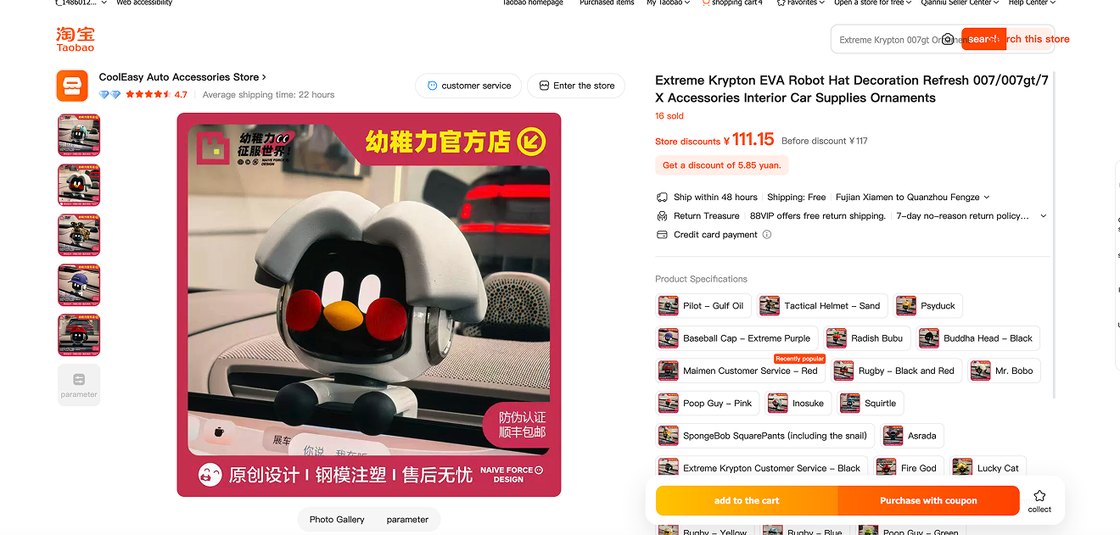
Pikobuy's own first step is choosing: on Taobao, Tmall, 1688, Weidian or Yupoo, settle the colour, size and options you want before you go near the agent. The official tip is to save the item or the shop, which is good advice because listings get taken down. If you are starting from this site, the pull list or a catalogue shelf already gives you the link.
Read the option names now, in Chinese if you can. The cheapest option is not always the item in the photo, and the pull list notes show how often that happens.
Step two: hand Pikobuy the listing link
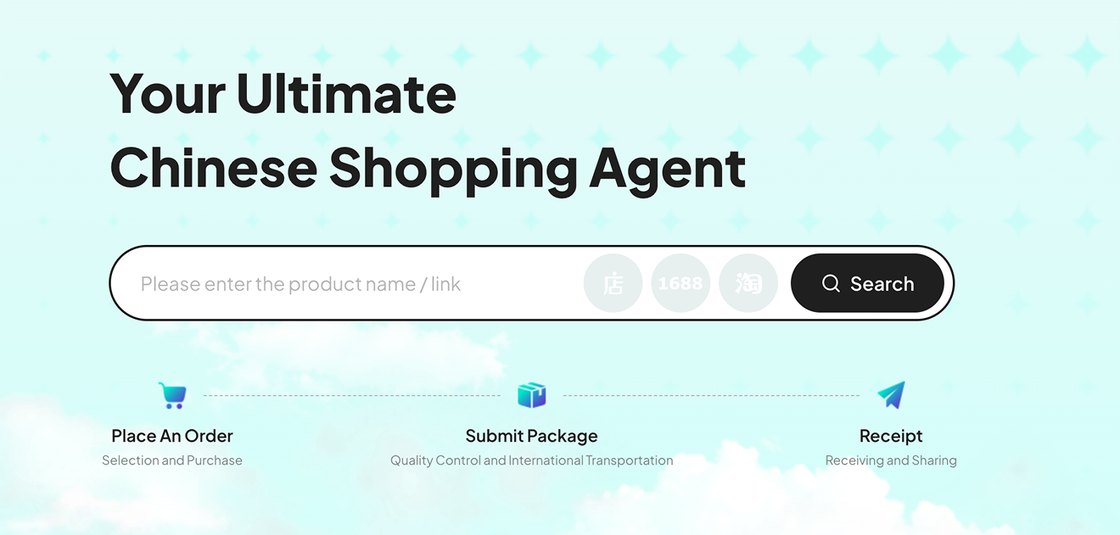
Copy the listing URL and paste it into the Pikobuy search box on the home page. Keywords also work, and the small camera icon runs a search by photo. Pikobuy turns the link into a product page with its own notes added: the purchasing hours, the seller-to-warehouse fee in yuan with a dollar conversion, and an estimated arrival date at the warehouse.
If Pikobuy cannot read a link, its search shows a message that the link could not be parsed. The tip on the official guide is to contact customer service, which Pikobuy describes as available around the clock.
Step three: options, extras and the item payment
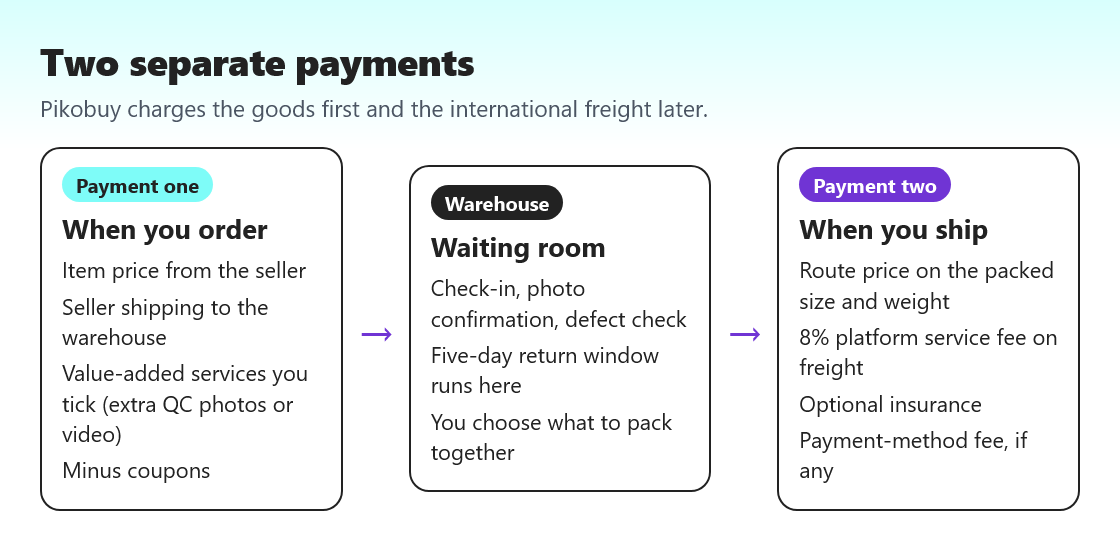
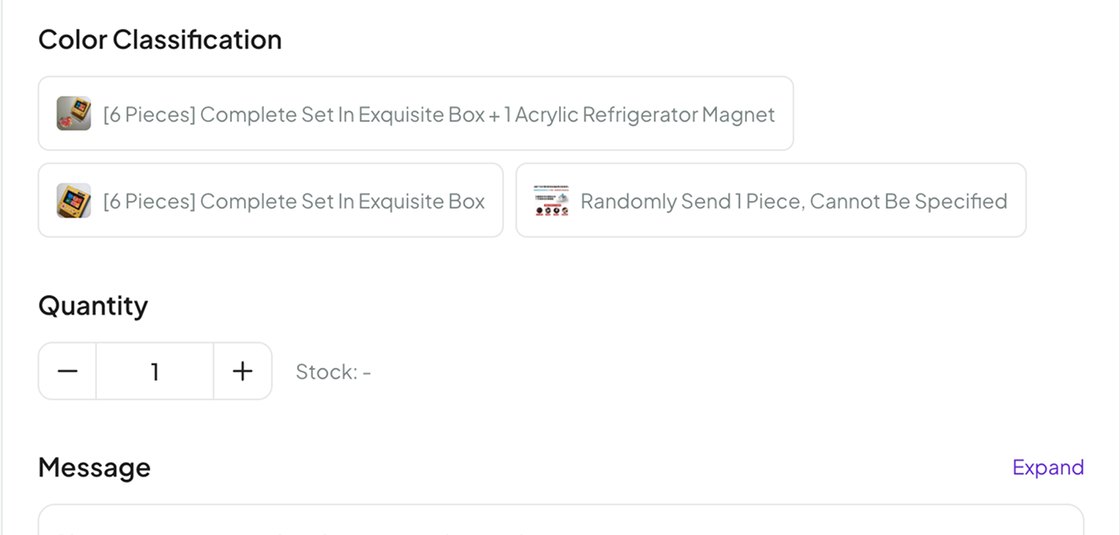
Pick colour, size and quantity, then add to the cart or buy straight away. The order page is where value-added services sit: Extra QC Photos, Extra QC Video and Remove box in the tutorial video. Add your photo note here. The order details panel then lists the subtotal, shipping to the warehouse, value-added service fees and coupons, and you pay that total.
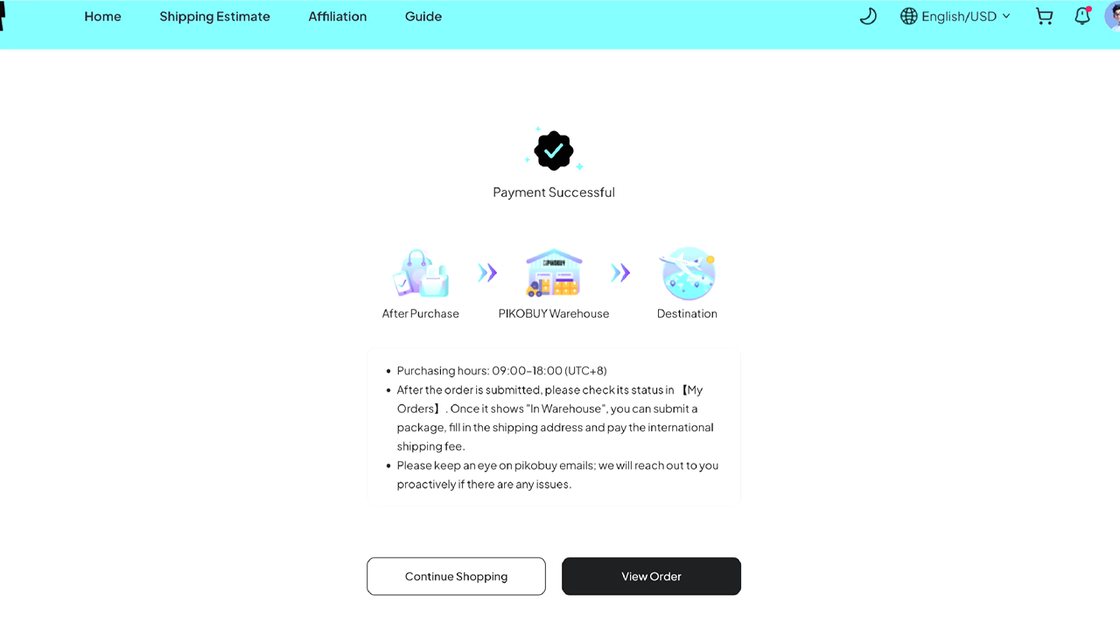
Pikobuy warns that the final price is whatever the buyer actually pays the seller, and it refunds orders the seller cannot fill. In the video, the success screen after payment lists purchasing hours of 09:00 to 18:00, UTC+8, so an order placed in the European evening is bought the next Chinese morning.
Step four: In Warehouse status opens the return window
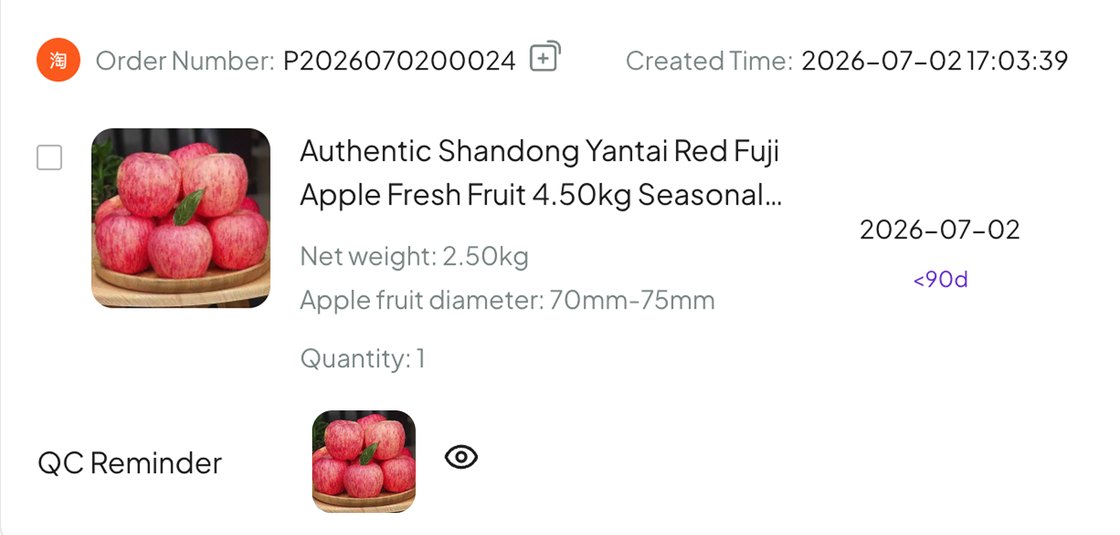
When the seller's parcel reaches Pikobuy, the item is checked in, photographed and checked for defects. The order status changes to In Warehouse, and this is the moment that matters for returns: you have 120 hours from the next full hour to ask for one. Your photos appear on the order line under QC Reminder.
This is also where you can ask for packaging changes. Pikobuy's tip mentions minimal or reinforced packaging. Read the photos the day they arrive; the QC photos page explains what to look for.
Step five: packing, route cards and freight
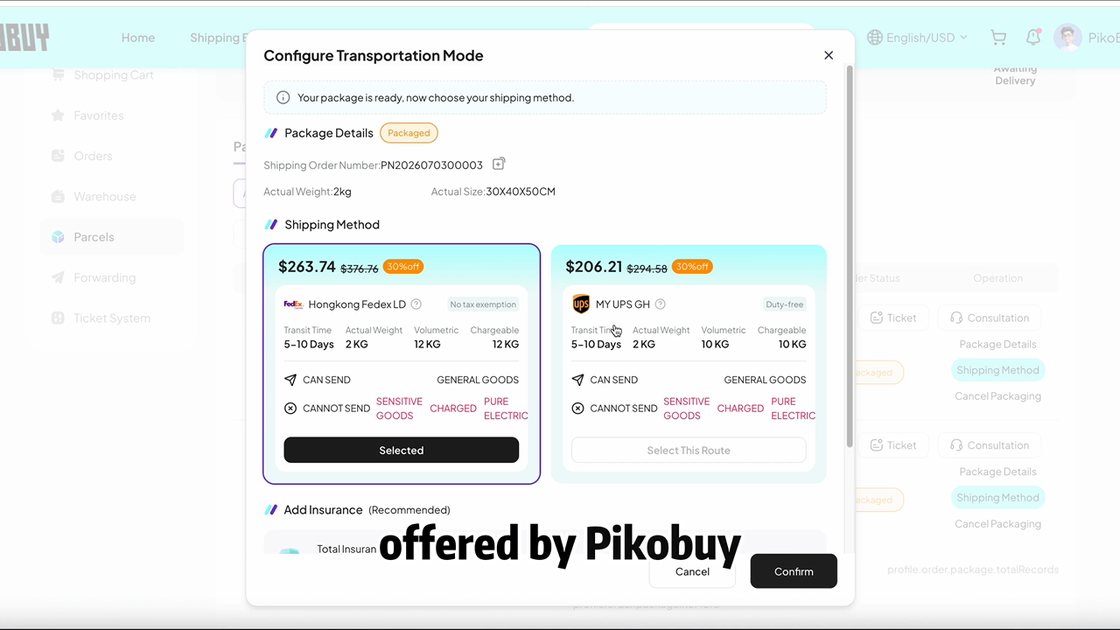
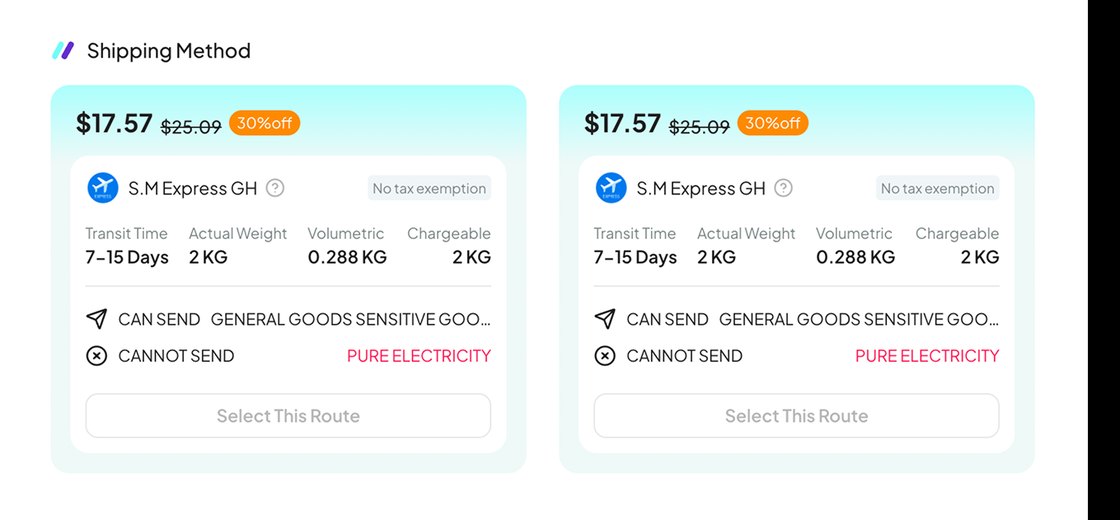
Tick whichever stored items should travel in one box, then request packing. Staff pack them, measure the box and weigh it, then notify you. Only then do you choose a route on the parcel page and pay. Each route card shows transit time, actual weight, volumetric weight and the chargeable weight, plus what the route can and cannot carry.
The official tip is that routes differ in transit time and billing method, so pick on your own priorities. Insurance is offered at this step and marked Recommended in the video. The freight bill also carries Pikobuy's platform service fee, which the user agreement sets at 8% of the shipping fee.
Step six: the quiet first week of tracking
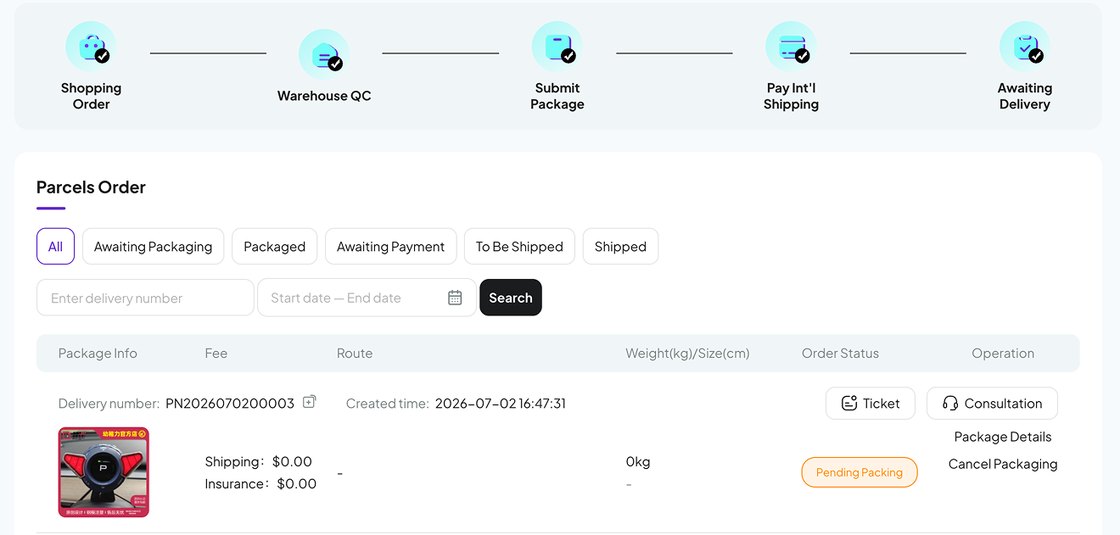
After dispatch, tracking information shows up within three days according to the guide. International legs are slow to update at first; a quiet tracking page in the first week is normal. Pikobuy's parcel list shows the status chain from shopping order through warehouse QC, parcel submitted and international payment to awaiting delivery.
If a route was insured and the parcel runs past the transit time published for that route, the user agreement allows a delay compensation request, which Pikobuy negotiates with the carrier.
After it arrives: confirm and keep the box
Check the outer packaging when you sign for the parcel; the user agreement asks you to contact customer service at once if something is wrong. Pikobuy recommends confirming receipt on the website, and after-sales requests have to fall inside a validity period counted from delivery and confirmation. Keep the packaging until you have opened and checked everything.
For anything tied to an order, the contact page recommends a ticket; [email protected], Discord and Reddit are listed beside it.
Where a pull slots into these steps
Steps one and three are where a pull list saves you time. The find gives you the link for step one and the photo request for step three. Everything after that is the same for any item, which is why the money and shipping details live on their own pages: costs, shipping and QC photos.